3D Printing
Theory
3D Printer are machines for an Additive Manufacturing process and add material instead of removing it like a milling machine (CNC). There are a lot of different printing technologies developed over time. In the following, we will look at the three most popular techniques.
Picture of an FDM printer (Source: esa-automation.com)
FDM Printing (Fused Deposition Modeling)
Cetus 3D Printer, a FDM printer, at the RapLAB
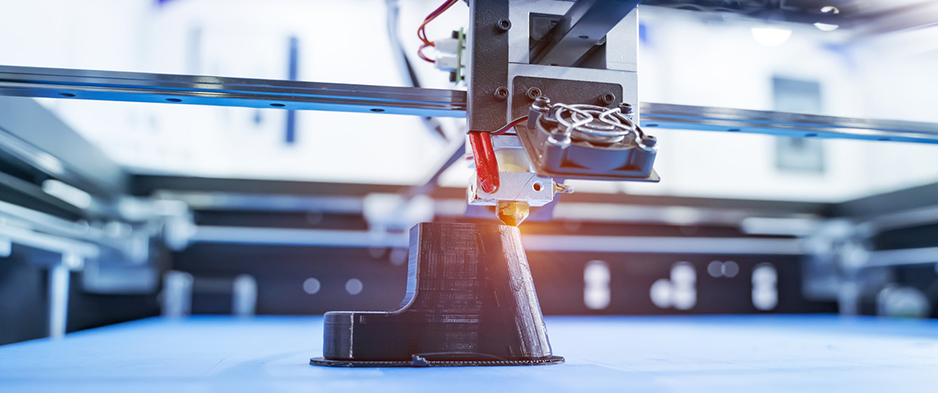
This is the most popular as well as the easiest and cheapest solution to an additive manufacturing process. FDM Printing use a filament out of plastic. The most popular filaments in the consumer market are ABS ( Acrylnitril-Butadien-Styrol) and PLA (Polylactic Acid). The printer head heats the inserted material up and distributes it in three axes. By extruding layer by layer, it reproduces the given 3d model. As already mentioned, it is relatively cheap and easy to print with this method. On the other hand, this method works with a visible layer structure, and you need to print support structure for overhangs above 45 degrees. Both processes will need post-process work to get a result with a smooth surface. Possibilities include sandpaper, filler etc. The final model can also be (spray-) painted.

A typical result from a FDM printer. The layer strucutre is visible and overhangs up to 45 degrees can be printed without support structure (Source: prusa3d.com)
SLA (Stereolithography) Printing
A SLA printer. In the bottom is a container with the resin as well as the light diode that fixes the resin to the building plate. The model is printed upside down. (Source: formlabs.com)
This is the oldest 3d printing technology. Invented in the 70s uses this printer, light that fixes a liquid resin. Other than the FDM printer this system works upside down. The print platform lifts out of the resin basin. The light technologies enable the highest resolution for the additive manufacturing mentioned here. Perfect smooth surfaces without visible layers are possible. Disadvantages to this technology: The printers are very expensive, and the resin is toxic if it is not fixed with UV light. A well-ventilated room and safety gear is mandatory. Support structures are also needed for SLA printing.
The result of an SLA printer has a much higher resolution than a fdm printer. The corners are sharper and the layer structure is barley visible. (Source: 3dprinterbank.com)
SLS (Selective Laser Sintering) Printing
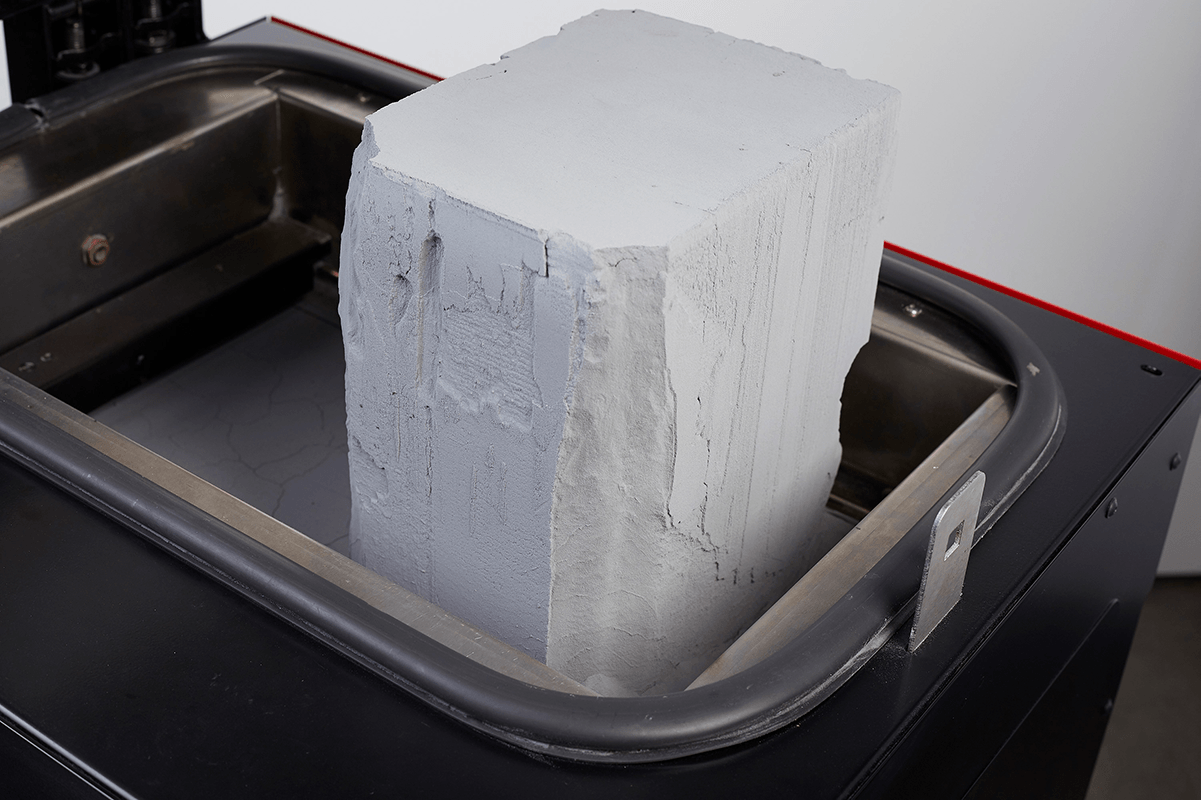
View on a print bed of a SLS printer. the white powder volume is a finished model. In a next step you blow the loose powder out to get to your printed model. (Source: sinterit.com)
The print bed is filled with a thin layer of powder. A CO2 laser melts layer by layer. The layers are not visible because they are covered by the not melted powder which work as a bridge and allows printing without any support structure. As soon as the print is finished, you blow the loose powder out of the print and your finished model appears. From all the technologies mentioned, this one is far the most expensive.
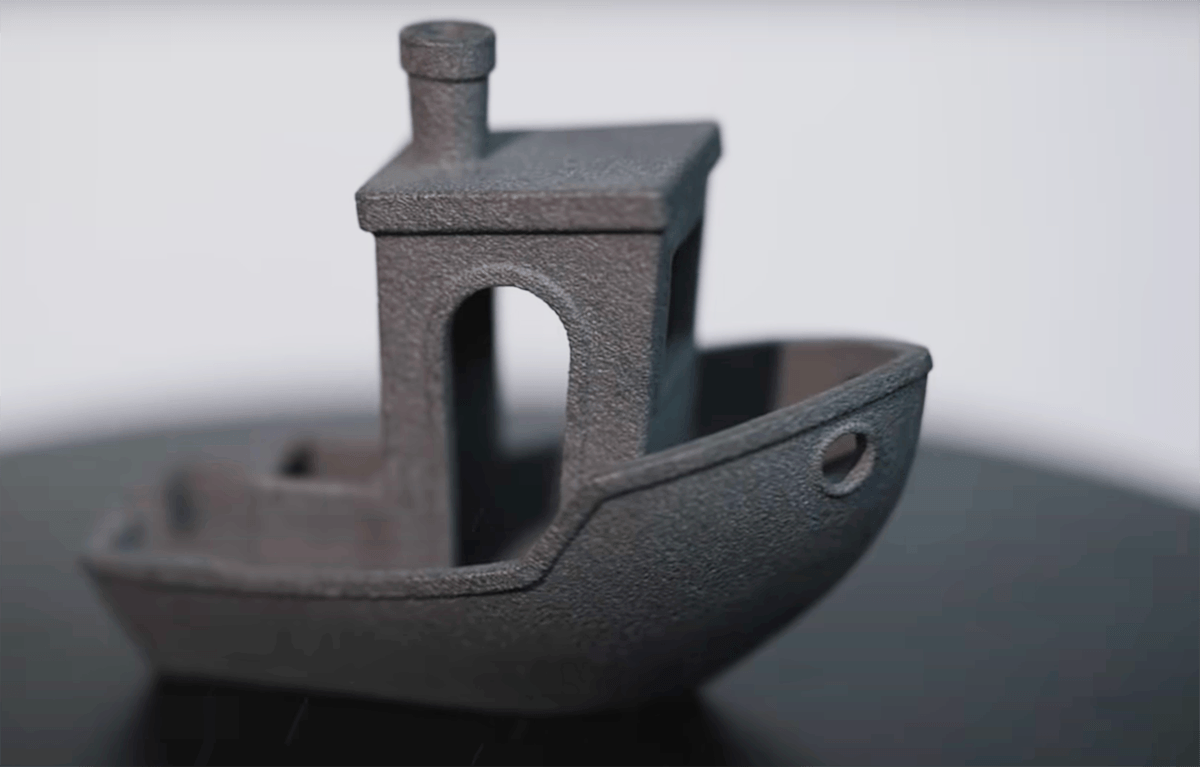
The prints of a SLS printer have a extreme high resolution. Need no Support structure and have no visible layer structures. (Source: youtube.com/philipps3ddruck)
Available Printers at RAPLAB
In the RapLab are mainly FDM printer and one SLA printer (which is only accessible for PhD Students) available.
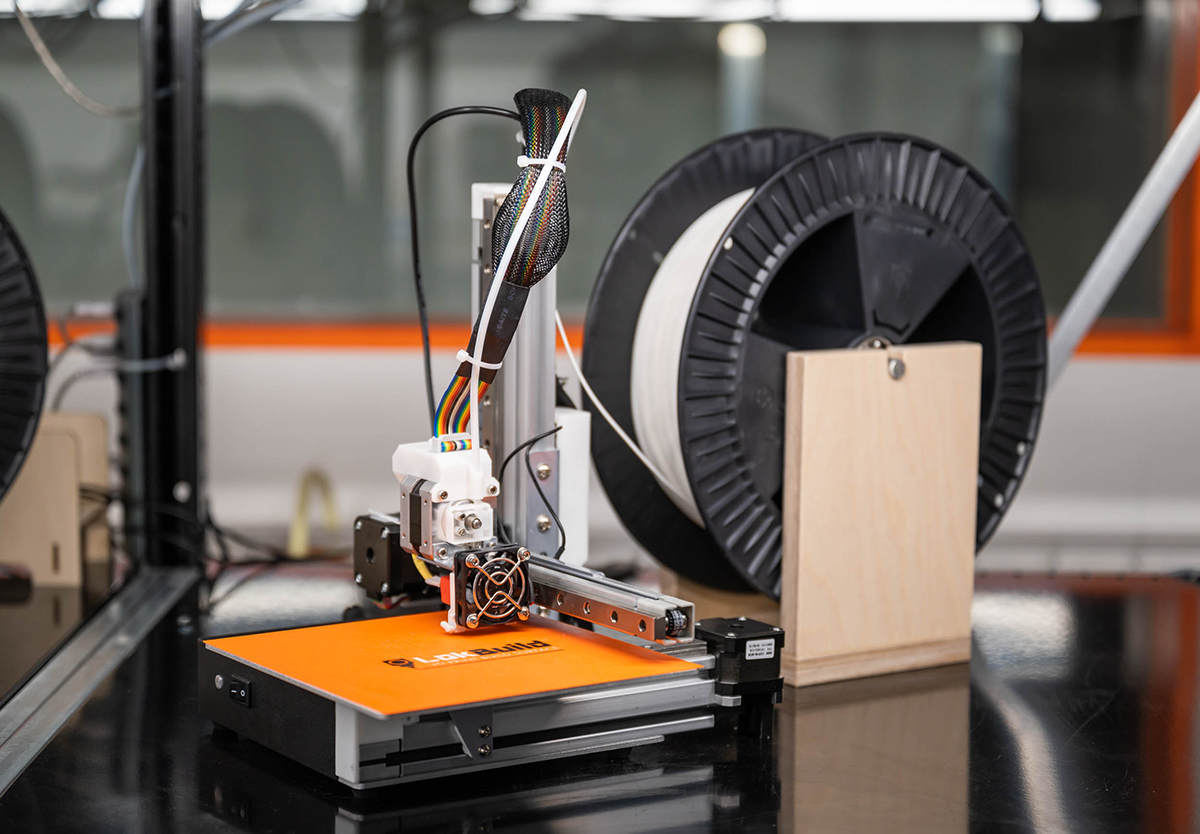
Cetus 3D Printer (FDM)
Source (raplab.arch.ethz.ch)
These printers are always loaded with white PLA filament. Which is also the only filament allowed to print. Other colors are possible in agreement with the RapLab-Team. There are other nozzle diameters available (Standard 0.4 mm, 0.2 mm and 0.6 mm are other options). The print bed is unheated. Which is no problem for printing PLA but can cause warping (the edges lift off from the print bed due to temperature difference). The max build volume is 180 mm x 180 mm x 180 mm (XYZ).
Raise 3D Printer (FDM)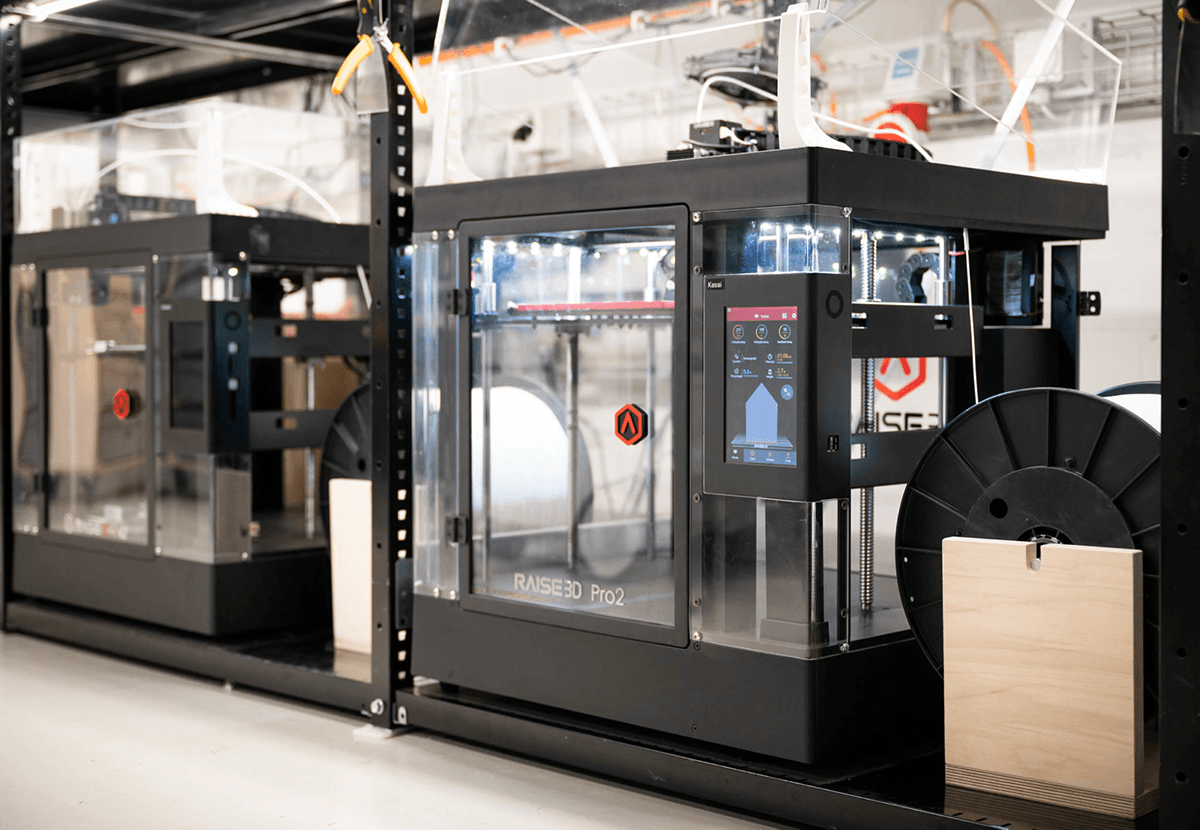
Source (raplab.arch.ethz.ch)
This printer has a bigger and enclosed build volume of 305 mm x 305 mm x 300 mm (XYZ). This printer comes with a heated build plate. A heated build plate is supposed to tackle warping - although not always successful at preventing it. The enclosure of the printers helps to get a better print environment with no external impacts (like a gust of wind from a passing human). There are two printers of this kind available at the Raplab, and the printing preparation differs from the Cetus printer.
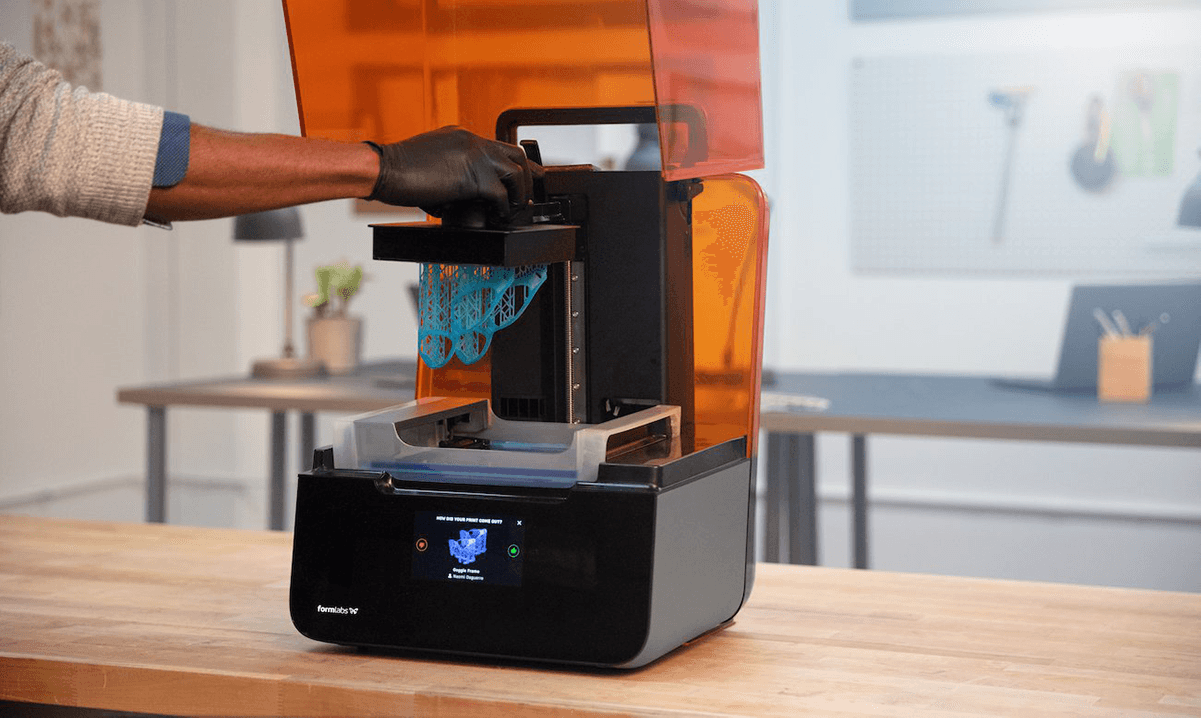
Form 2 (SLA)
Source (raplab.arch.ethz.ch)
This is an SLA printer, loaded with white resin. Currently, this printer is only available for PhD students. After printing, you must wash the print with isopropanol and fix it with UV-light.
Basic Knowledge for FDM
Physical influence
There are three main physical factors which have a direct impact on the print quality besides the given print file from you, the filament, the print speed and the nozzle diameter. The filament defines the nozzle temperature. Which is basically the temperature that the print head reaches to melt the filament. Only if the filament is fluid enough, it is printable. A little too cold and it does not extrude or has no layer adhesion. Too hot, and it flows too fast or blocks the nozzle. The average temperature for PLA is 190-220 °C. A special factor is the printing bed. The temperature and the material of it defines how (and if) the material sticks onto the build plate. Only if the friction is high enough, the print will be a success.
Print speed
On a normal printer with normal cooling, PLA is recommended to print between 30-50 mm/ s. With professional hardware it is possible to reach print speeds up to 1000 mm/s. Of course, with the compromise of stringing, layer shifts and a reduction of surface quality.
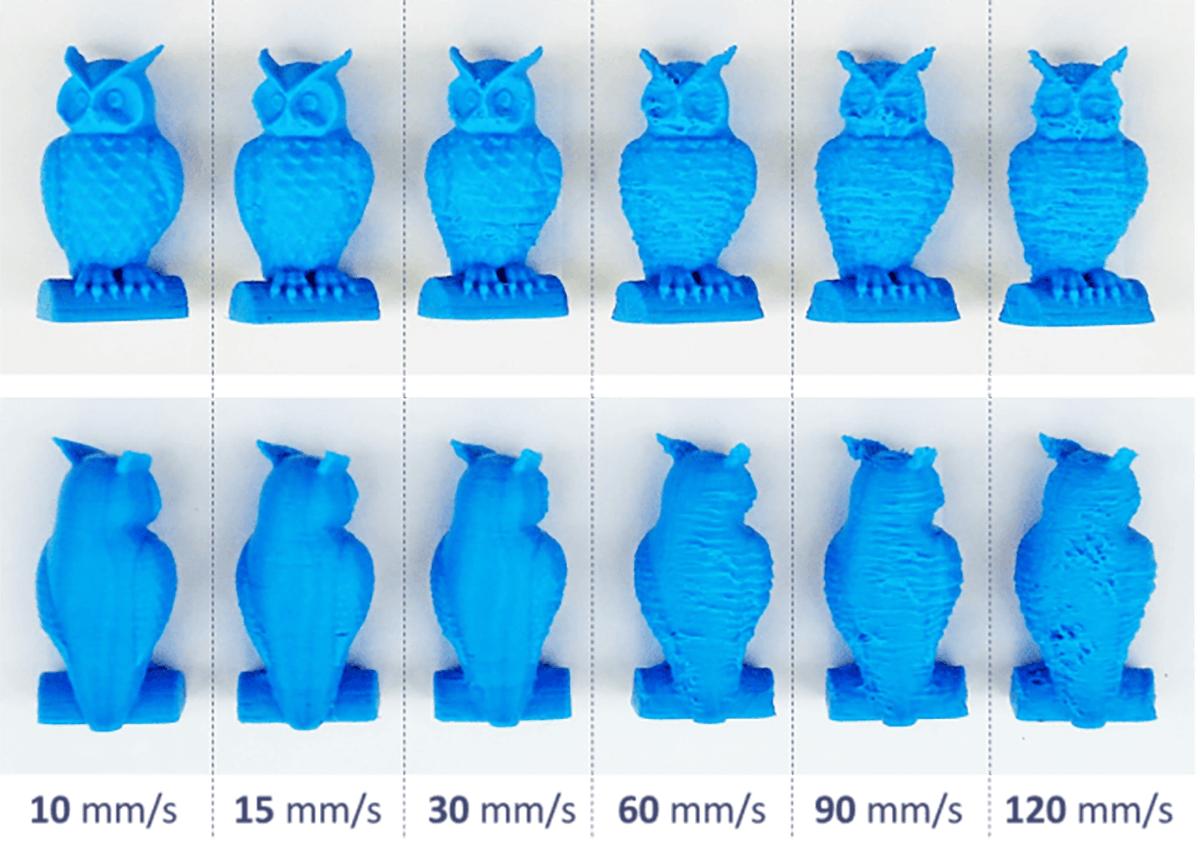
By increasing the print speed the print quality gets worse. The filament has not enough time to cool down and connect to the previous layer. Increasing the cooling can help to solve this problem. (Source: easy3dhome.com)
Nozzle diameter
The standard diameter is 0.4 mm. The diameter controls the amount of filament which is printed but has also a direct influence on the possible layer heights. The layer height should not exceed 80% of the nozzle diameter. For example, the 0.4 mm nozzle can print up to 0.32 mm layer height. If you go higher, you lose adhesion between the layers and the print probably fails. A bigger nozzle diameter increases the possible layer height and with that makes the print faster. The downside of that is you lose fine details due to higher layers.

The different nozzle diameters and their corresponding layer height. You can clearly see the influence to the print resolution (amount of details in the print) (Source: youtube.com/The3DPrintGeneral)
Software Influence
The slicing software prepares your model for printing. It cuts the model in separate layers and creates the needed internal and external support structures. Most of those calculation processes are completely automated and the results will be good enough for standard prints.
Preview of a 3d model in a slicing software (cura). You can see the skirt around the model, the infill, the walls and the support structure (Source: Chair of Christophe Girot)
Orientation
FDM printer stack layer on top of each other. Due to that there is a difference in material strength parallel to the layer and rectangular to the layer. The layer adhesion is strongest parallel to the layer. The orientation effects also the surfaces. Horizontal surfaces look rather different. Keep that in mind when setting up the orientation of the model before printing.
Support Structure
You can safely print overhangs up to 45° with PLA and bridge a layer parallel to the layer up to 8 mm (depending on nozzle diameter, cooling and print speed). If you need steeper angles for overhangs or larger gaps in your model, you will need support structures. Those can be generated with the slicing software and must be removed manually after the print. It increases the print duration and has also an impact on the surface quality and the intersection where the support structure connects with the final surface. You can of course model your own support structure if you want to control where the support is positioned. Just make a gap from half the layer height between support structure and final surface. This helps that the filament doesn’t stick too hard to the support structure. Manual support structure is often needed to get the maximum out of your final print quality, or if you get to the limits of your software's ability to create automatic support structures.
Complex models with overhangs above 45 degrees need a support structure. Wherever this structure connects the final modelsurface you will see some small spots in the model. (Source: all3dp.com)
Raft, Skirts and Brims
These techniques help to hold the print to the printing bed. It reduces warping effects or indicates in the first layer how the printer is calibrated.
Raft – is often used with ABS and elevates the print from the printing bed and reduces warping. (Source: Chair of Christophe Girot)
Skirt – is an outline around the printed area on the first layer. It indicates how well the filament gets extruded and how it sticks to the printing bed. Stop the printing process if you see an unclean skirt at the beginning of your print.
Brims – is also an outline. But directly connected to the base of the print. It helps to increase the adhesion between print and bed by increasing the base surface of the object. Very useful if your object has a small footprint. It also helps to keep the corners down (warping).
Infill
The amount of infill has an impact on the surface quality of the top side, amount of filament needed, printing speed, and the strength of the model. An infill of 20 % is usually enough for a mechanically non-demanding print. The crisscross pattern is standard and can be let untouched in most cases.
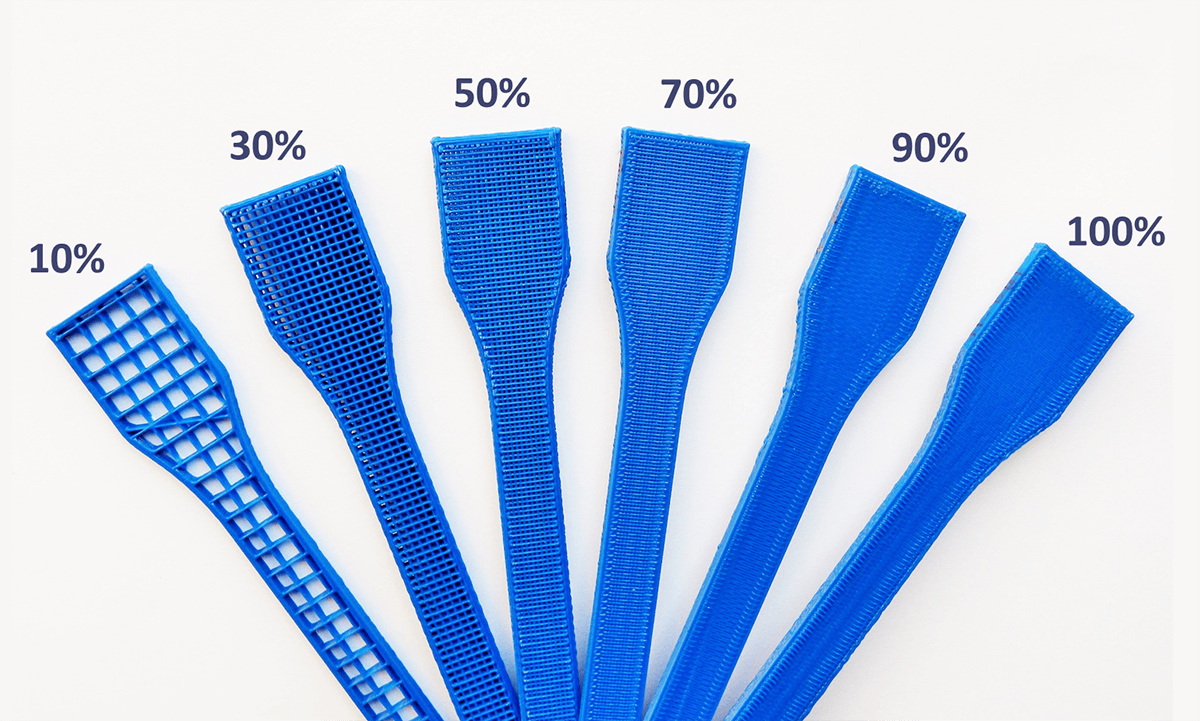
Infill settings. 20-30% is enough in most cases. A denser infill pattern only increases print time. (Source: 3deee.ch)
Layer/Layer thickness
Defines the height of each layer. It corresponds to the nozzle diameter and isn’t freely adjustable. (See nozzle diameter). You can also increase or decrease the number of layers on the top/bottom and the walls. A minimum is two layers. Less will result in ghosting or poor surface quality due to too less material or support. The layer quantity increases the model strength more than the infill!
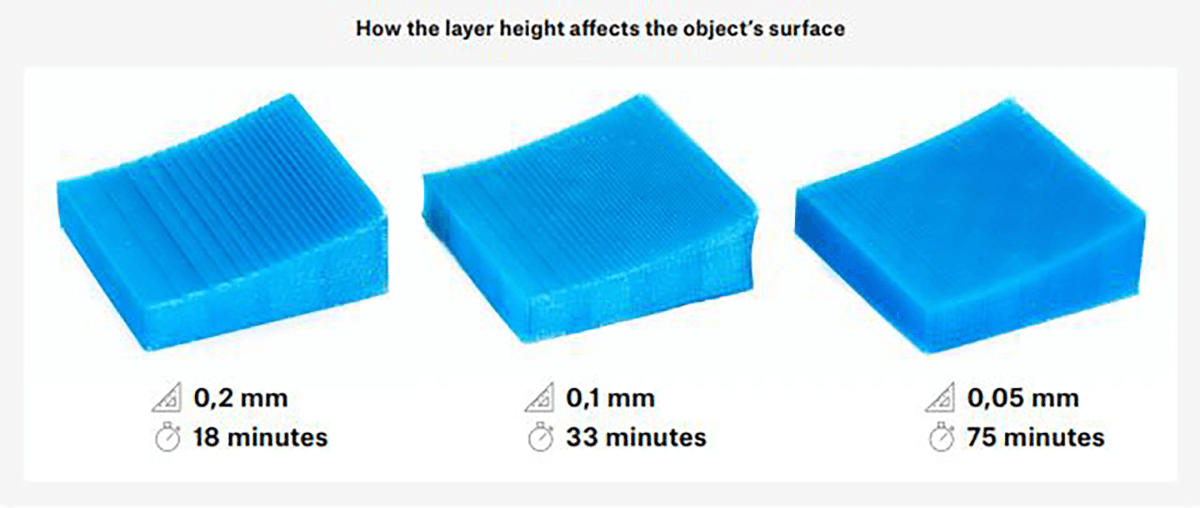
The layer height influence the amount of details that can be reproduced as well as the print time (Source: b3d-online.com)
Preview
Always have a look at the preview to check if the support is at the right places or to check how the infill was created.
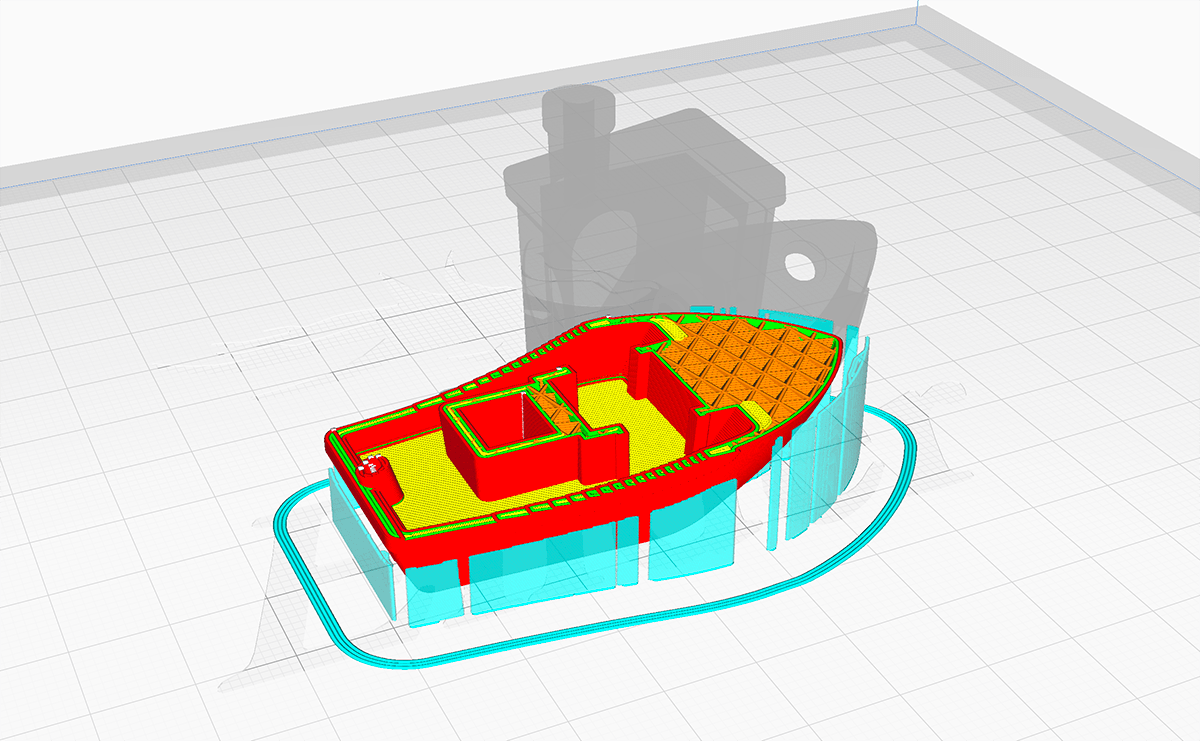
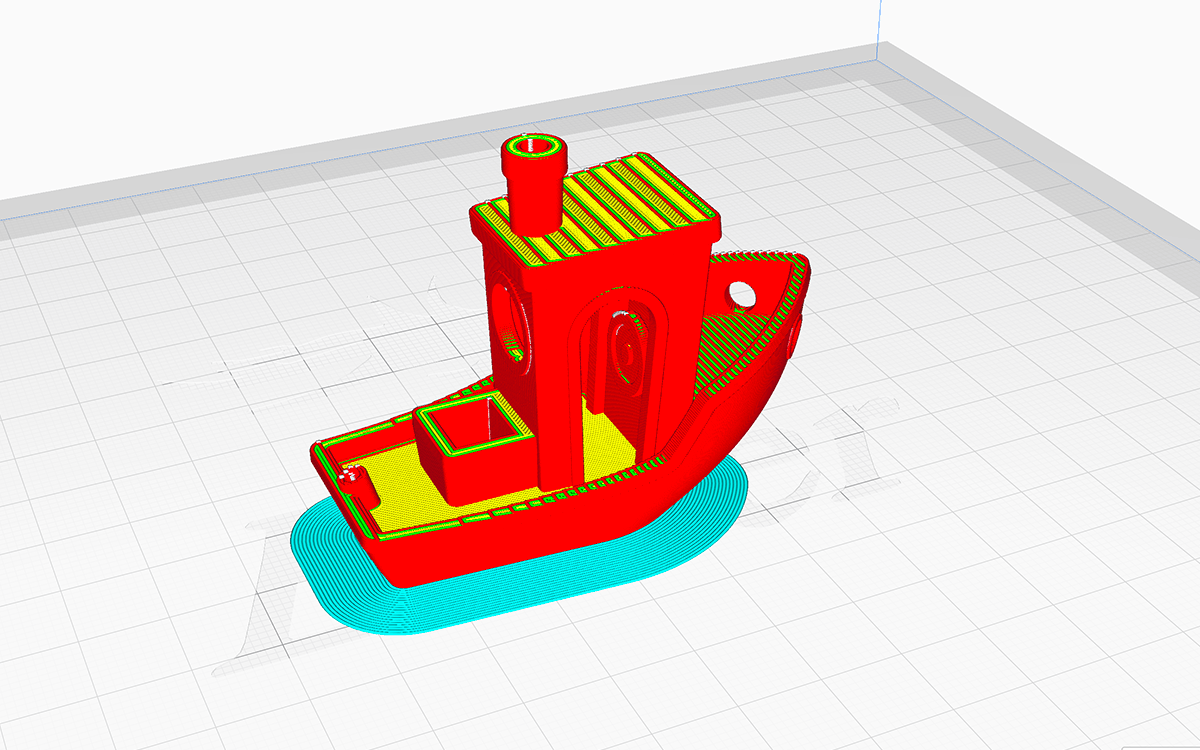
This example shows that there is support generated around the boat although, it isn't needed. There has been a wrong option checked in the slicing software. (Source: Chair of Christophe Girot)
How to print
File-Preperation
Your file is key to a good print. Always prepare your model separately for 3d printing unless it is already a model for 3d printing from the web. Often it is necessary to remodel your design for the 3d print to get the best result. There are some basic parameters that should always be checked:
- Is your model a closed volume? or in other words, is it watertight? Only if every surface is connected to another it is possible to print.
- Is the thinnest point on your model at least once the nozzle size?
If both is yes you can export your model as an .stl file (stereolithography file). This is the most common CAD file and is supported by the most 3d modeling program like rhino or fusion.
Slicing
The next step is to import your .stl file to the slicing software and generate a G-code. The G-Code is basically the manual for the printer on how to print your model. It tells it where to move and how much filament it should extrude and so on.
The two FDM printers at the Raplab uses different slicing software.
Cetus 3D
(Source: raplab.arch.ethz.ch)
The following Tutorial as well as some more tips can also be found at: https://raplab.arch.ethz.ch/cetus-3d-printer/
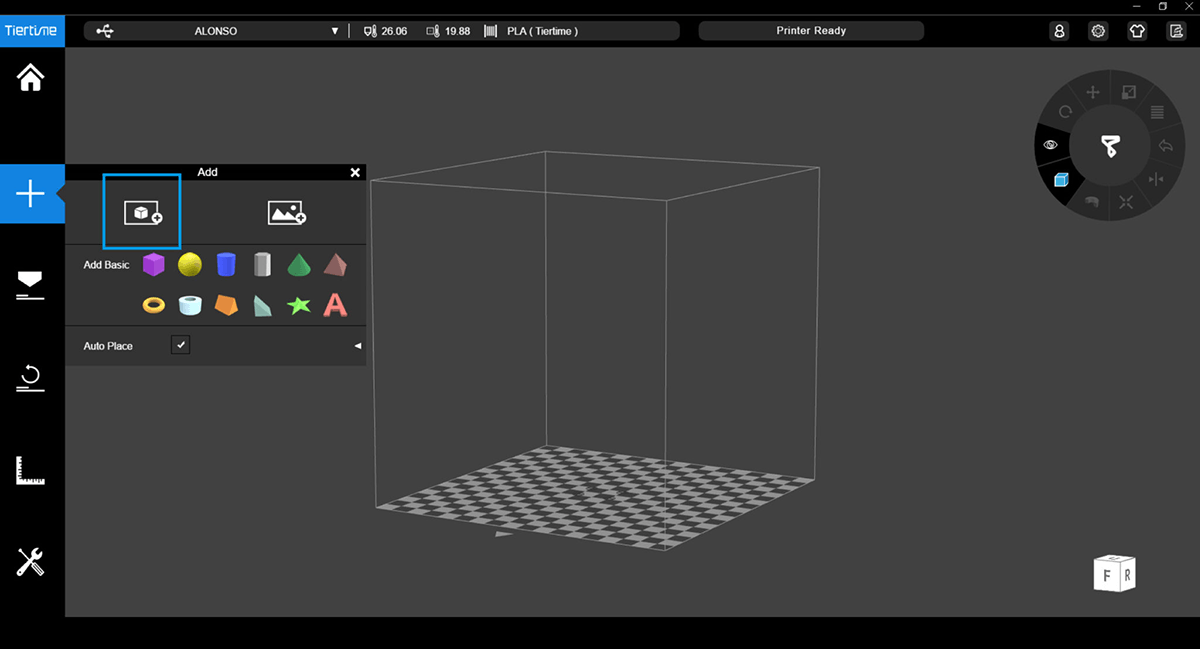
This printer uses the Slicing Software Tiertime and the computer is right next to the printers. After unlocking the machines with your ETH card and start the machine by holding, turning the trigger switch to ON. The printer then boots up and start to calibrate itself.
Open the Tiertime Software on the computer and click on UP in the menu on the left side. (Source: raplab.arch.ethz.ch)
Import the file by clicking on the big “plus” symbol on the left menu bar. In the Submenu choose “add Model” (left icon). After the import you should see your model in the virtual print space in the middle of the screen. (Source: raplab.arch.ethz.ch)
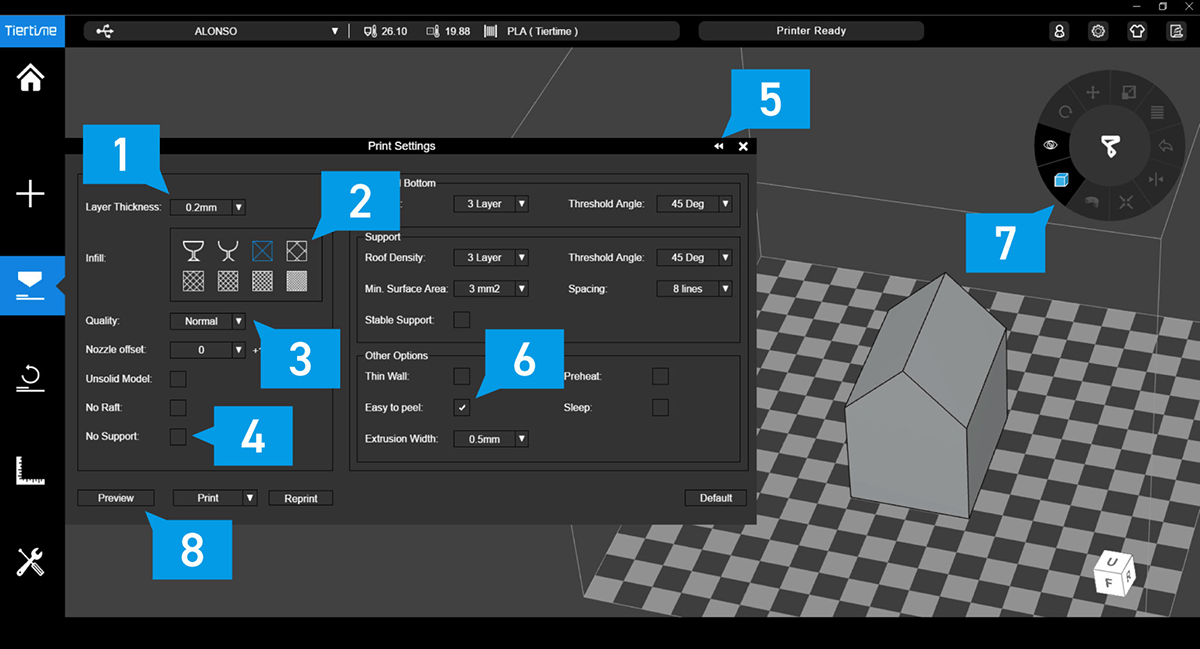
Then you go to the next menu underneath the “plus” symbol to choose your print settings. You can extend your options by clicking on the arrows in the top right corner (5)
Layer thickness of 0.2 is fine in most cases (1) Infill between 15-20% is also fine for non structural models (2) Quality on normal (3) Choose if you need support or not (4) And check “easy to peel” (6)
The top and bottom option can be left untouched unless you want to get a stronger model
You can also move/scale/rotate your model with the wheel menu on the top right corner of the program (7)
Always preview your print by clicking on “Preview” (8)
(Source: raplab.arch.ethz.ch)
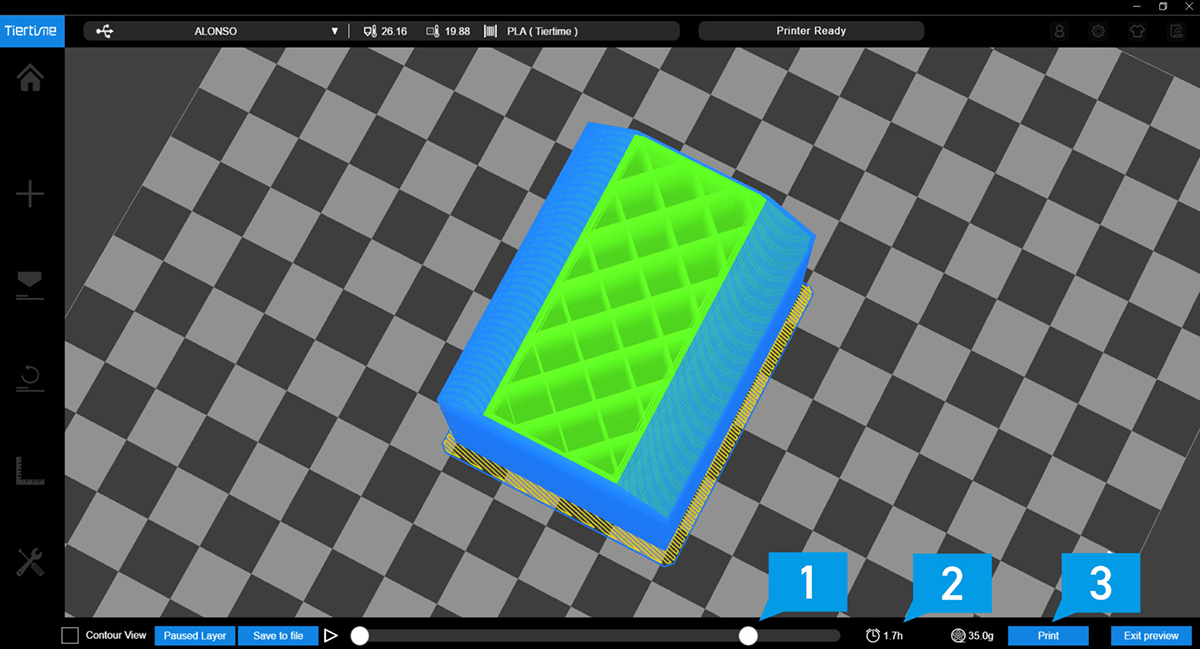
Check the print sequence (1), the print time (2)
If everything is fine, start your print by clicking on “print” (3)
You should check the progress of your print from time to time especially the first few layers are crucial for a good print. If the first layer looks uneven or does not stick to the print bed stop the print. And contact the Raplab Staff (Source: raplab.arch.ethz.ch)
Raise 3D
(Source: raplab.arch.ethz.ch)
The following Tutorial as well as some more tips can also be found at: https://raplab.arch.ethz.ch/raise-3d/
The bigger printer use Ideamkaer. Other than the Tiertime software you can download it to your own computer and generate your g-code there. Because you need your own USB stick to transfer it to the printer. The process is very similar to the smaller printer.
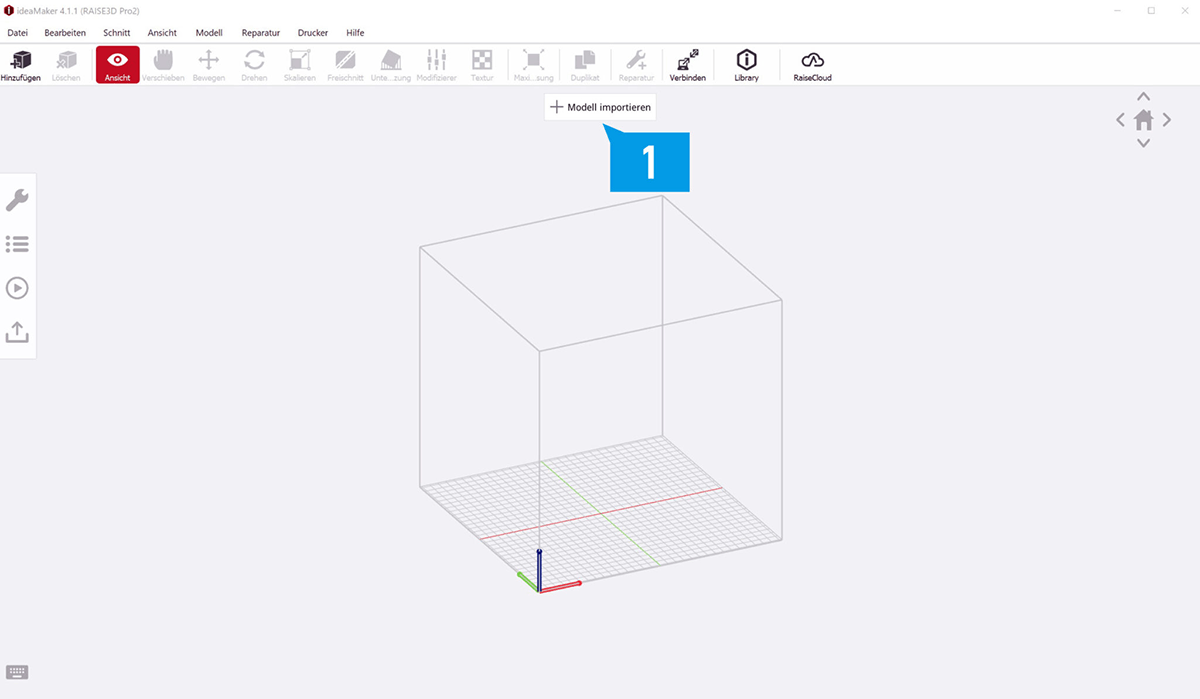
Open Ideamaker on the computer at the Raplab or your own one. Import the .stl file with the button on the top. (Source: raplab.arch.ethz.ch)
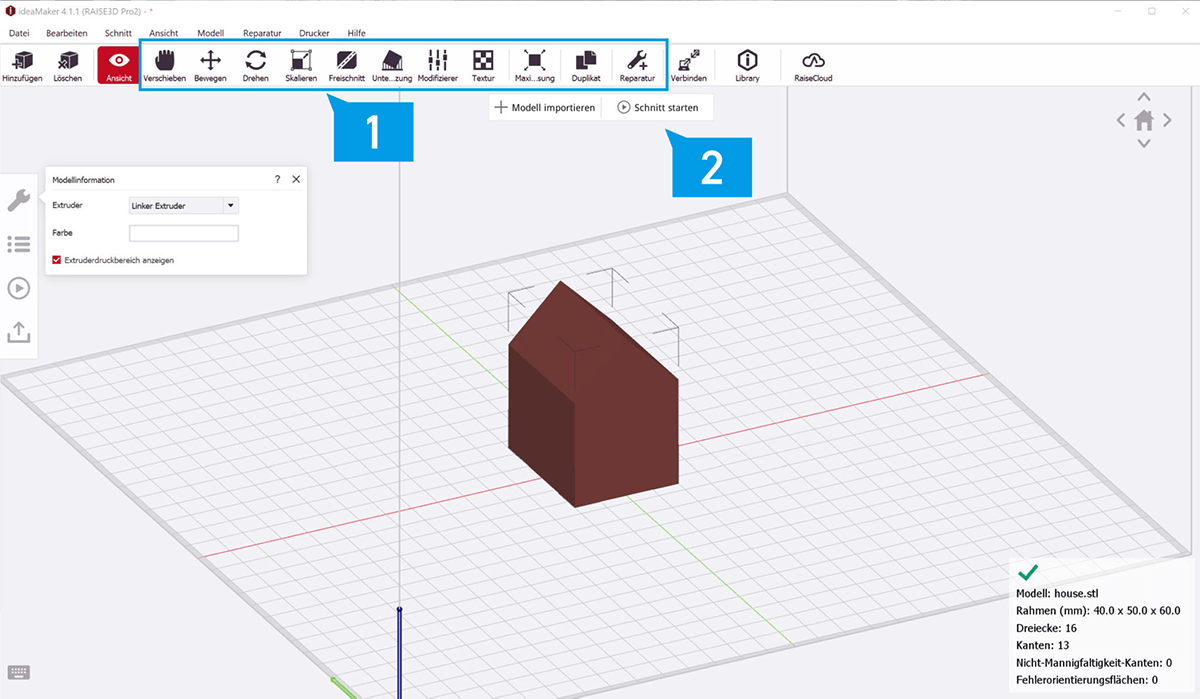
You can rotate/move/scale your model (1) as well, before you start the slicing (2). (Source: raplab.arch.ethz.ch)
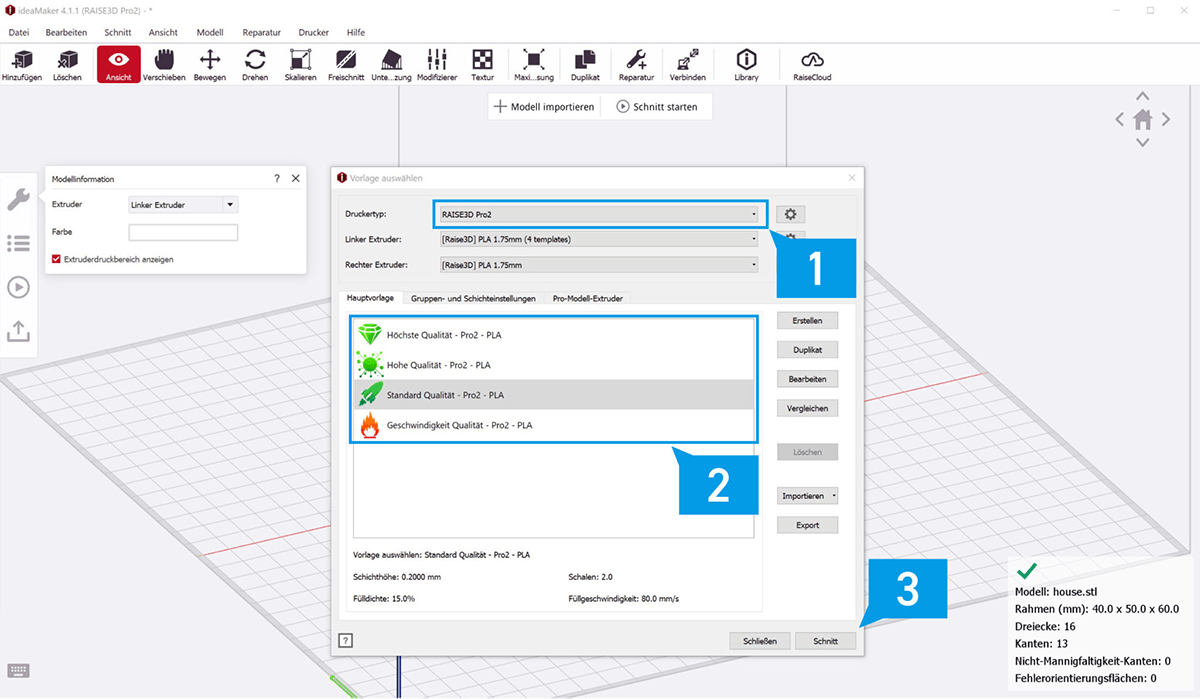
In the following menu choose the printer in the drop-down list. (1) “Ahonen – Raise3D, Kasai – Raise3D Pro2”. Then Choose the printer settings (2). And start slicing (3).
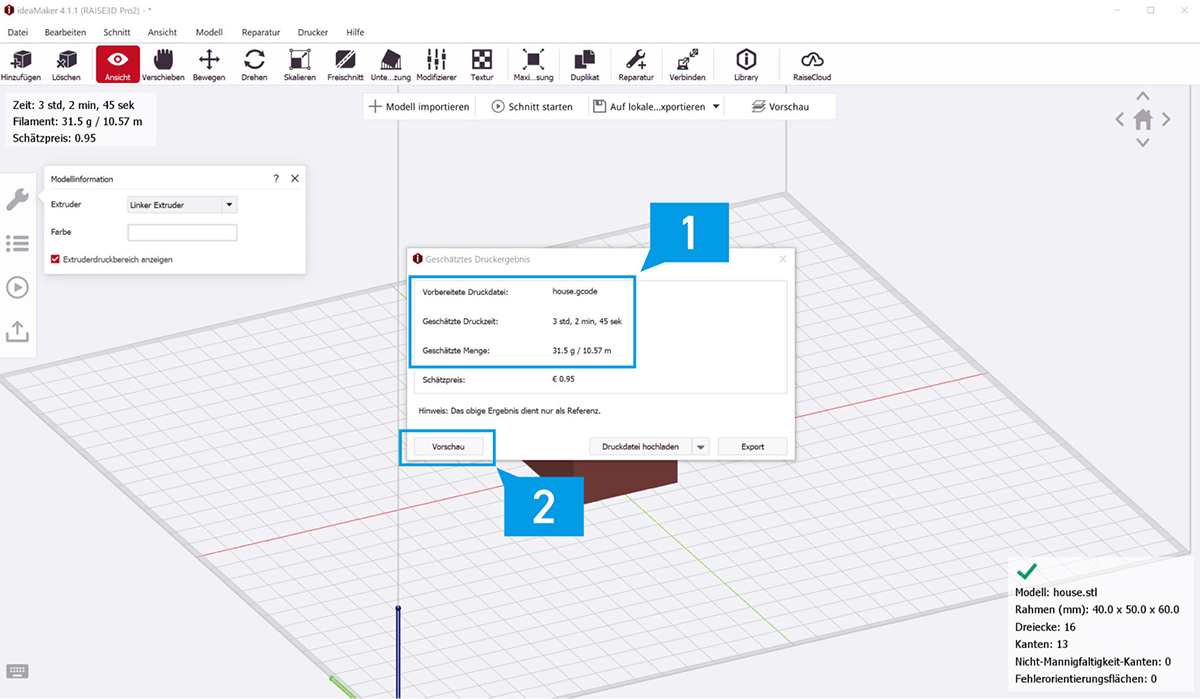
Check the Print time (1) and preview the slicing (2). (Source: raplab.arch.ethz.ch)
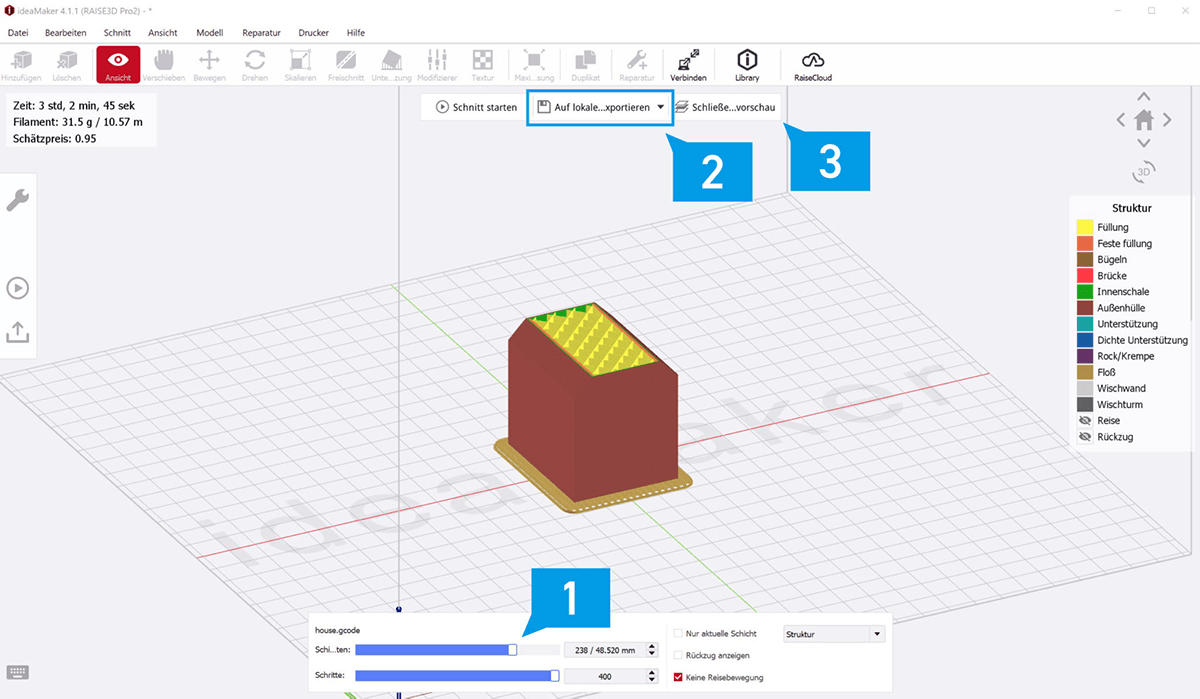
With the slider in the bottom, you can simulate the print time layer by layer(1). If everything is fine save the g-code to your USB stick (2).
Then go to the printer and unlock it with your ETH Card. Connect the USB stick to the printer and go to “file” in the menu. Choose your file and start the print.
Troubleshooting
Following are some of the most common Printer problems:
- The Print loses friction, and the print fails
This is often the case if the print bed isn’t calibrated well. It should have a consistent distance to the nozzle. Contact the RapLab-Team and they will calibrate the printer for you if this is the case. If you print with a heated bed, you can increase the bed temperature, which helps the filament to stick to the bed. Sometimes cleaning the bed or adhesive spray helps as well. Contact the Raplab team before applying any adhesive spray to the printing bed.
- Warping
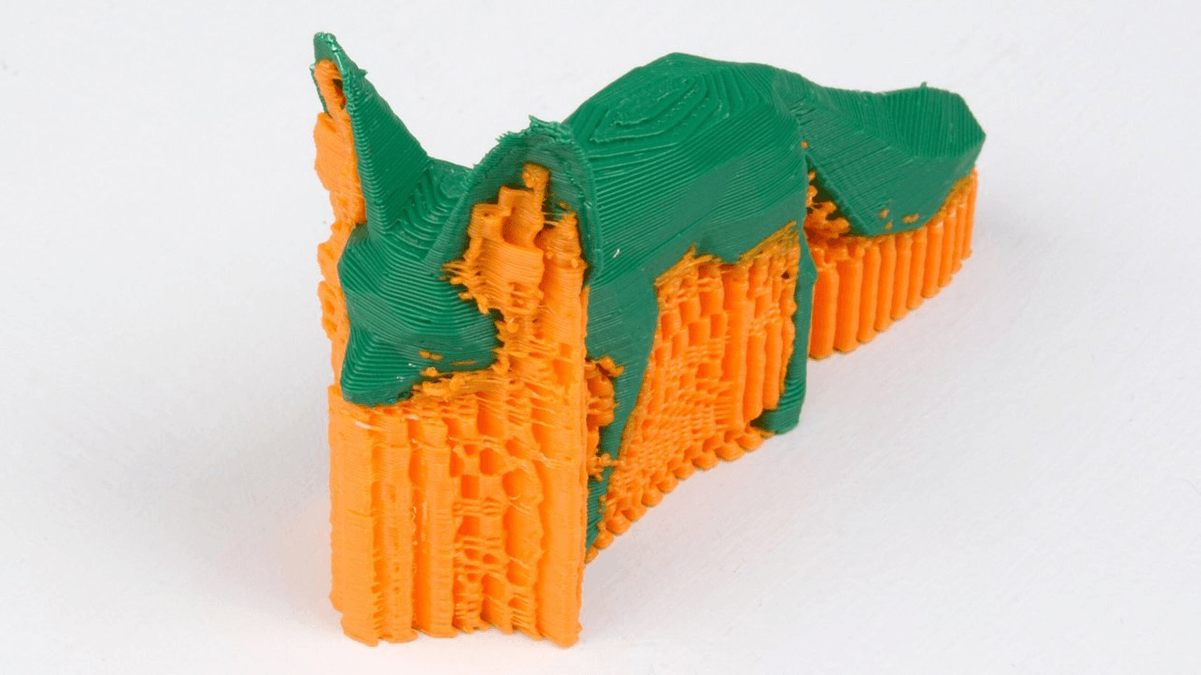
The Edges lift from the ground. This is often the case when you try to print large surfaces and the temperature difference between top and bottom layer of the filament is too big. Increase the bed temperature or the printer cooling. Using a “Brim” support in the slicing software or rotating the model might help as well.

The Edge lifted off the print bed due to a too high temperature difference from the already printed part to the newest layer. In worst case the print loses friction and fails completely. (Source: Ultimaker.com)
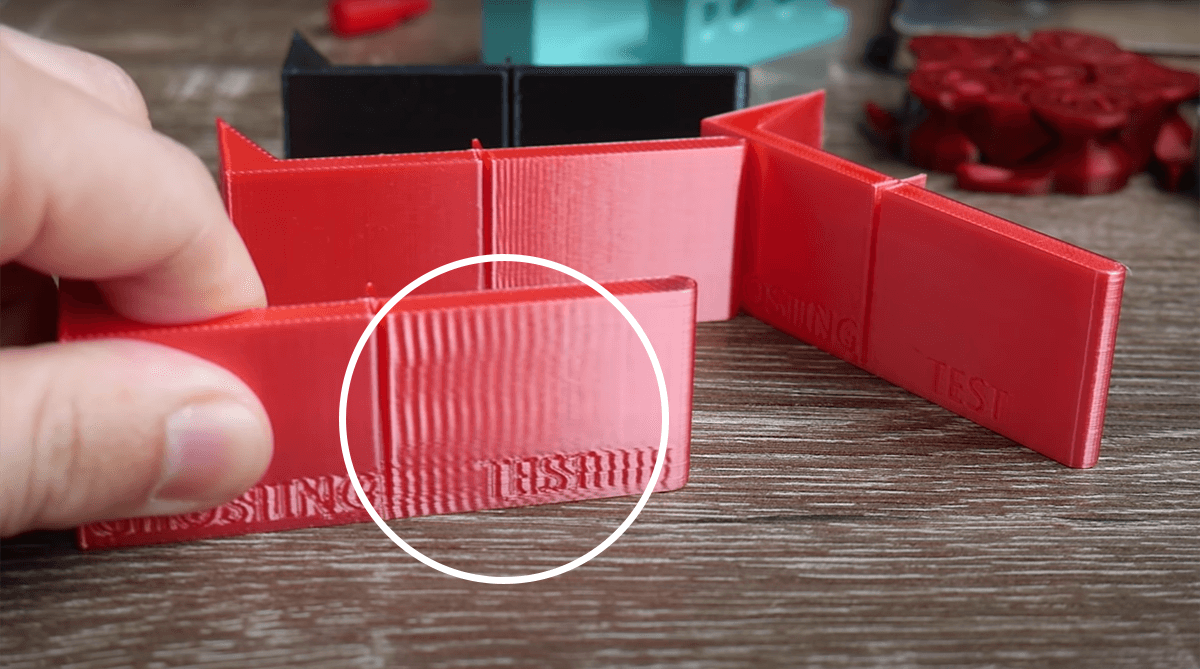
- Ghosting (Visible Support Structure)
To fill the volume, the slicer creates inner walls as a support for a more rigid volume. If the outer walls are too thin, the inner support walls become visible. Lower the print speed or increase the wall count of the outer wall to fix this problem.
The visible waves on the surface are infill walls that shine trough the too thin outer wall. (Source:Youtube.com/MakersMuse)